
A card for any occasion
By Lina Vosa
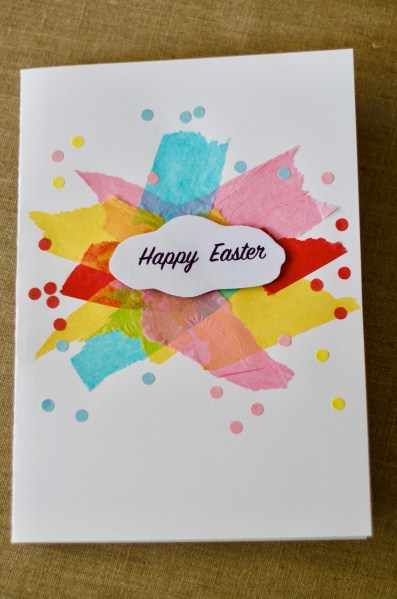
This is a very easy and quick card to make, which could be for any occasion, not just Easter.
To make this card you will need:
Card blank (or you could make your own from stiff paper)
Crepe paper in different colours
Card paper
Coloured craft paper
PVA glue (white liquid glue)
Glue dots/pads
Small paintbrush
Hole punch
Instructions:
Tear crepe paper into strips and glue carefully to the blank card.

Use the hole punch to make coloured paper dots and glue them around to look like paint splashes. Print your text on a piece of card paper, cut into a cloud shape and stick some glue dots on the back.
Stick the card paper with text in the middle of the colour splash and your card is ready.
If you try to make this design, send your pictures to aimee-rosehillnews@hotmail.com and you could win a prize.
Sweet Easter Crafts
By Lina Vosa
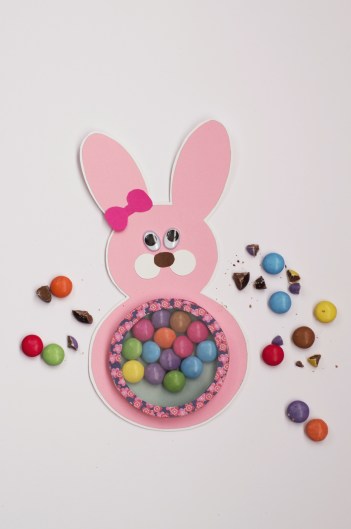
Once upon a time lived an Easter Bunny who loved chocolate so much that he ate it for breakfast, lunch and tea. So no surprise that his belly became big and full of chocolate.
- coloured paper
- A4 card paper
- pencil
- rule
- scissors
- glue
- sticky tape
- wiggle eyes (optional)
- clear lid from yogurt pot
- chocolate buttons
Search on internet for a bunny outline and print it straight on coloured paper. Or you can draw your own using household objects.

Cut out template and glue it on the card paper. Cut out again leaving about 1-2 mm white edge. Glue on the wiggle eyes. The draw and cut out 2 small circles from the white paper for the cheeks, then glue them on.
Cut out small oval for the nose from dark paper, cut it out and stick it in the middle of bunny face to cover cheeks a little bit as shown in picture.
Cut two strips of A4 coloured paper 6-7mm wide and about 30cm long, glue one strip inside belly to cover the edges of the rings; glue the second strip all around the outside belly. Glue the belly on to the Bunny.
Draw one more ring the same size but from coloured paper now, cut it out. Cut a circle from a clear yogurt pot lid the same size to make a cover for the belly.

Fill belly with chocolate buttons, glue clear lid on top, glue ring from coloured paper on to the lid.

Christmas Crafts
By Lina Vosa
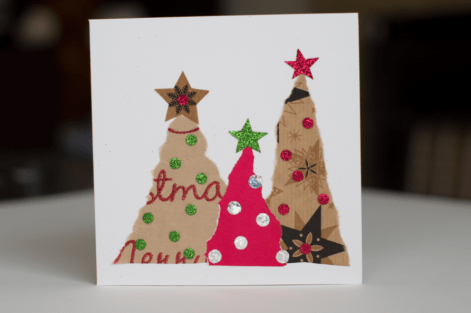
Handmade cards are more special than bought ones, because one of ingredients we use to make them is love!
This very easy to make Christmas card can be made using coloured paper, old magazines or gift wrapping paper.
You will need: glue or sticky tape, scissors, pencils and blank card (or you can make your own).
I used 3 different bits of gift wrapping paper. Just tear out 3 different sized triangles and glue them to the card.
Draw 3 stars, cut them out and glue on the tops of the triangles. You can use paper punch cut-outs or small buttons to embellish the Christmas trees. Be creative!
Merry Christmas to everyone!
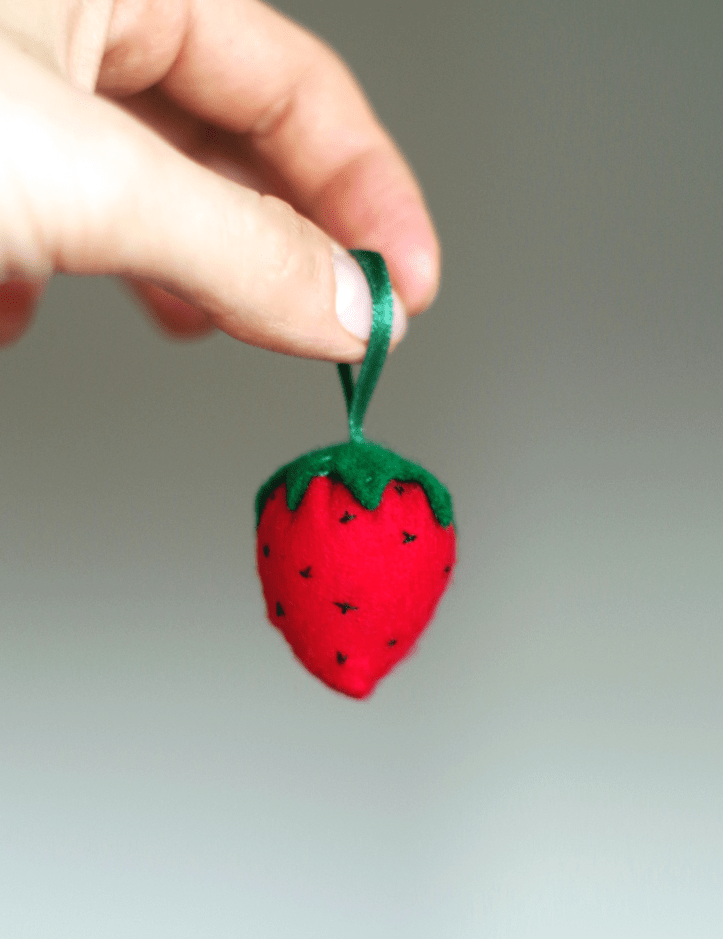
Sunny Strawberry
By Lina Vosa
You will need:
Red and green felt
Bit of ribbon
Bit of toy stuffing
Red, green and black or white thread
Needle
Scissors
Soft pencil or pen
Step 1:
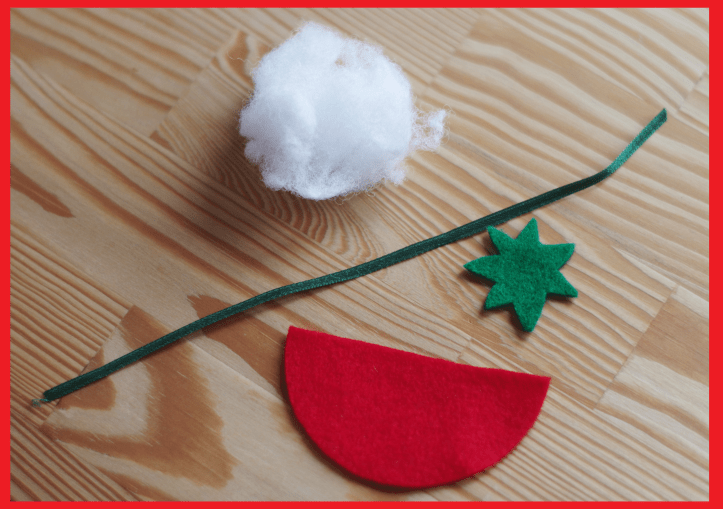
To make one strawberry you need half a circle of red felt. The easiest way to do it is draw a circle and cut it in half. Then draw an irregular star on green felt. This will be the strawberry leaf.
Step 2:
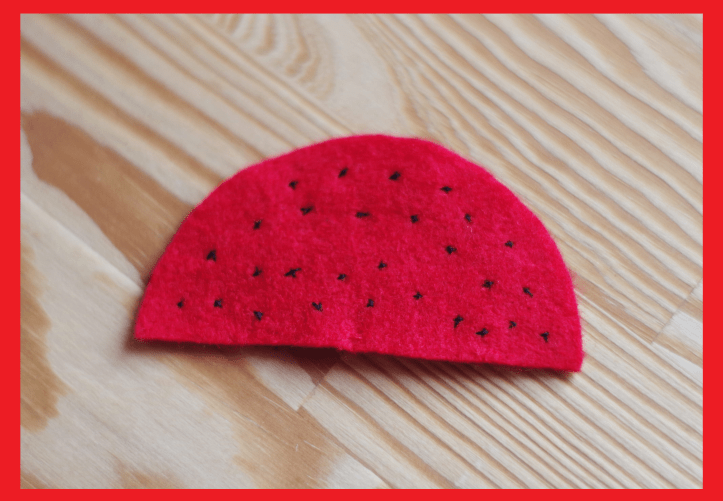
Next we have to embroider little stitches on red felt. I used 2 strands of black thread. But you can use white thread or even small seed beads if you like.
Step 3:

Fold the red felt in half and stitch one side using a running stitch with two strands of red thread. Make a knot to secure your stitching.
Step 4:

Now stitch all around the edge using running stitch. Fill your toy with stuffing.
Step 5:

Pull the string to close and make a knot to secure and seal.
Step 6:

Stitch the ribbon to the sides of the strawberry.
Step 7:

Poke a hole through the green felt, pass the ribbon through it and slide it down on to the strawberry.
Step 8:

And finally stitch around the edge of the leaf using the running stitch and 2 strands of green thread.

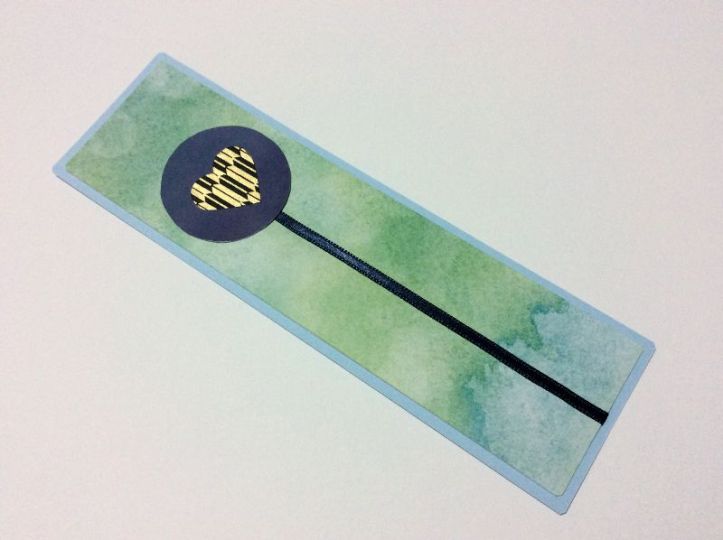
Beautiful Bookmarks
By Lina Vosa
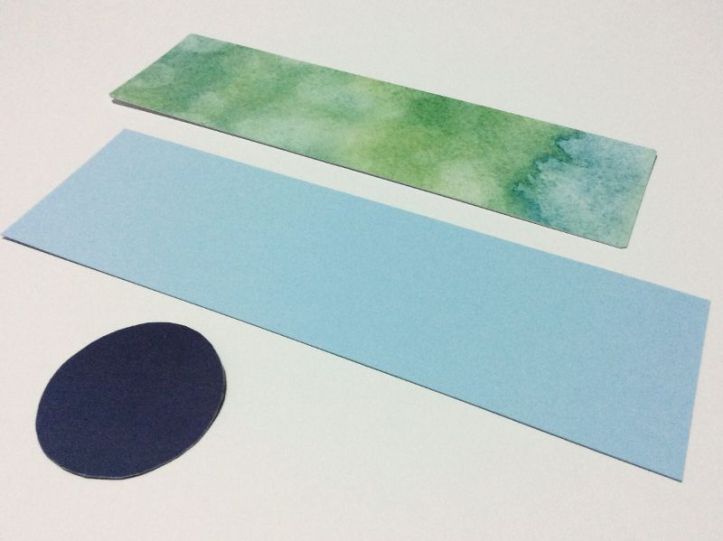
Cut one rectangle 5 X 20 cm.
Cut another rectangle 5, 6×20, 6cm from a different colour paper.
Draw a 4cm diameter circle on the 3rd coloured paper, cut it out.
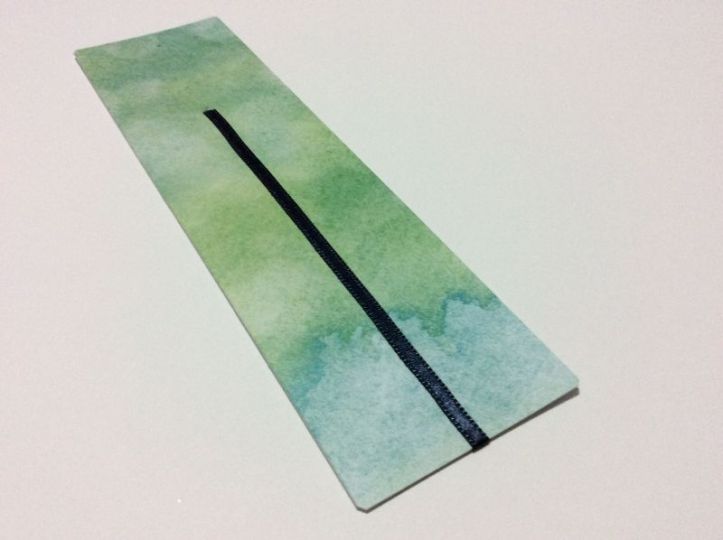
Glue the ribbon in the middle of the smaller rectangle as shown in the picture leaving 1.5-2cm end. Secure the ribbon end at the back of the paper with a bit of sticky tape.
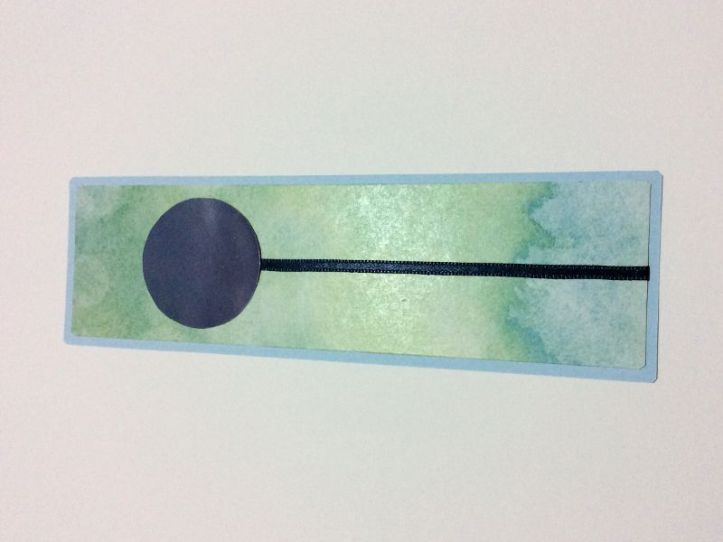
Glue the smaller rectangle on top on the bigger rectangle leaving a thin border all around. Glue the circle, covering the end of the ribbon.
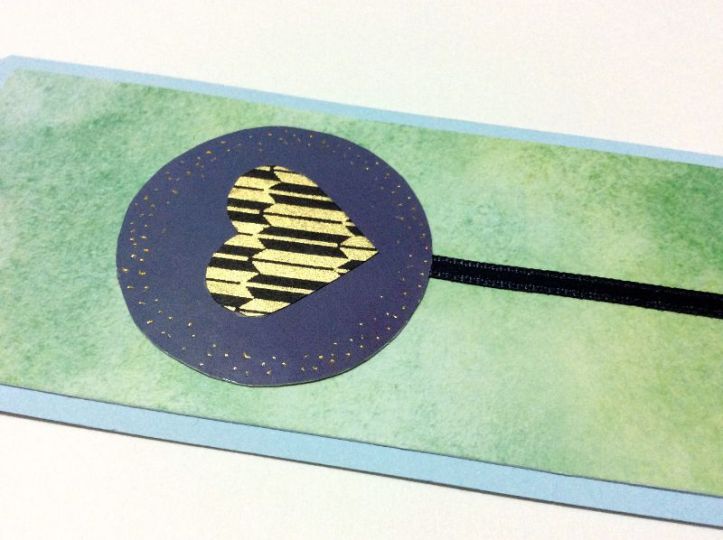
Draw a little heart, cut it out and glue to the circle. I drew a few dots around the heart with a gold pen, to make it more interesting.
Felt flower headband tutorial
By Lina Vosa
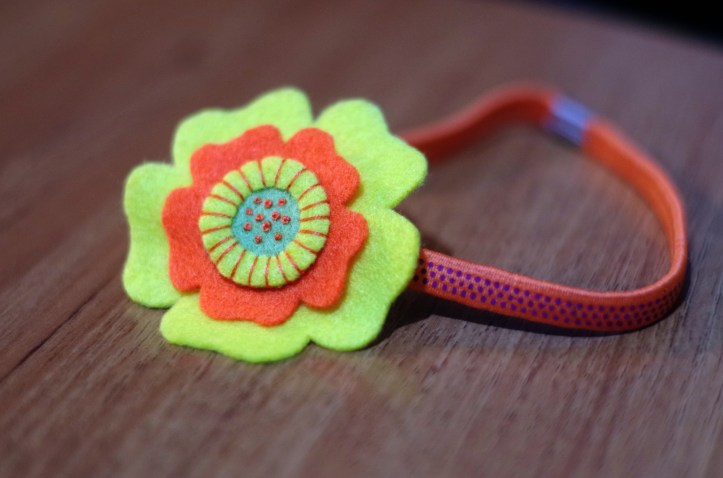


– First we have to make paper templates.
– Draw 2 flower shapes – 1 bigger and 1 smaller on the paper.
– Draw a circle with a hole. You can use household objects to draw a circle.


– Cut the templates out of the paper.
– Pin flower templates to the different colour felt, draw around with a soft pencil and cut it out.
– Place a circle template on the felt, draw around it, cut it out.
– Place a circle template on the different colour felt, draw circle with a hole, cut it out.


– Place a smaller flower on top of the bigger flower.
– Place the circle without a hole on top of the smaller flower in the centre.
– Stitch together using random simple stitches with 2 strands of thread. Or you can embroider little crosses, or embellish it with beads or sequins.
– Place circle with a hole on top, align with the other circle.
– Stitch all together (through all layers) around circle with a hole using a straight stitch as shown in the picture.
– Stitch the headband on to the back of the flower using a whip stitch. When you finish, make a knot and hide the thread between layers of felt.
END RESULT:
